How to setup Camera and Microphone
When joining a session as a presenter or when asked to join by a host, a pop-up will appear to configure your devices such as camera, speaker and microphone.
Here, you can toggle your microphone and camera on or off by clicking on the icons on the left, and select the desired device with the drop downs on the right.
If you are experiencing any issues, you can click 'test my connection'.

Windows and Mac
You can configure your devices by clicking on the camera Icon in your URL
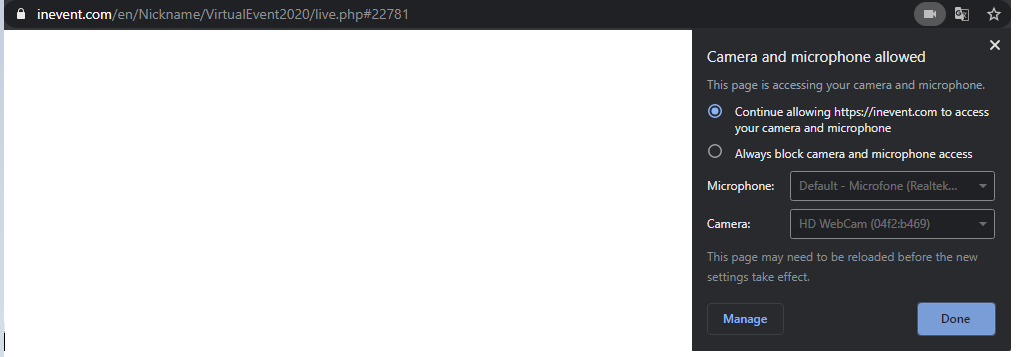
Click Manage if you wish to change the device preference. You will need to refresh the page after the changes made.
You might find helpful another article: How to give access to your camera and microphone in Chrome
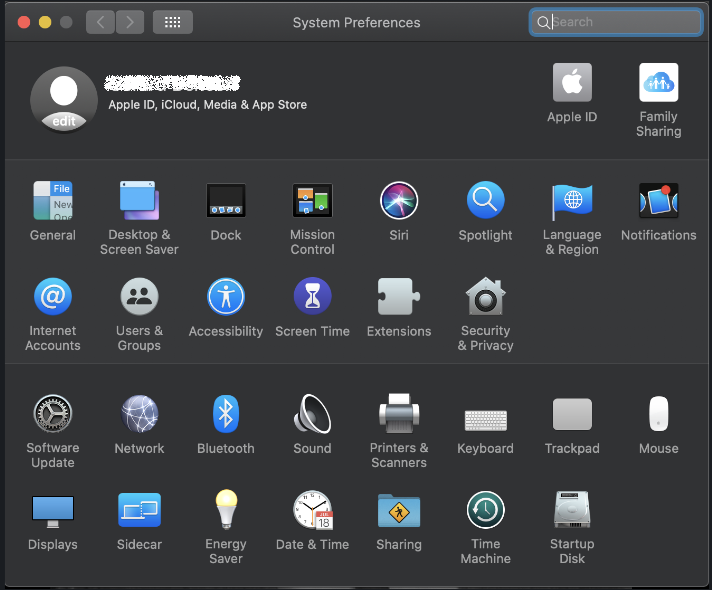
Macintosh camera access
On Mac you may need to follow some of these step as security may block the use of the devices, if you are using them for the first time. It needs to be enabled manually.
Go to System Preferences > Select Security and Privacy
Select the Privacy Tab on the options above to allow access to devices from the list
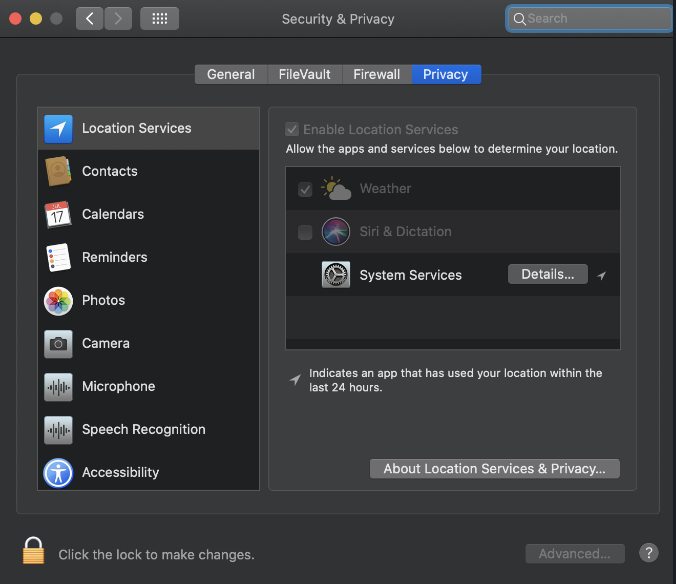
Select Camera > Check Google Chrome (the browser you use) by ticking the box

Select Microphone > Check Google Chrome by ticking the box

Select Screen Recording > Check Google Chrome (the browser you use) by ticking the box

Given access, you will be able to join with a secure connection
